Jennifer Lambert

A Sacred Balance

Visit Us On FacebookVisit Us On PinterestVisit Us On InstagramVisit Us On Linkedin
  • Homeschool
    • Book Lists
    • How Do We Do That?
    • Notebooking
    • Subjects and Styles
    • Unit Studies
  • Travel
    • Europe
      • Benelux
      • France
      • Germany
      • Greece
      • Ireland
      • Italy
      • London
      • Porto
      • Prague
    • USA
      • Chicago
      • Georgia
      • Hawaii
      • Ohio
      • Utah
      • Yellowstone and Teton
  • Family
    • Celebrations
    • Frugal
  • Military Life
    • Deployment
    • PCS
  • Health
    • Recipes
    • Essential Oils
    • Fitness
    • Mental Health
    • Natural Living
    • Natural Beauty
  • Faith
  • About Me
    • Favorite Resources
    • Advertising and Sponsorship
    • Policies
  • Reviews

© 2025Jennifer Lambert · Copyright · Disclosure · Privacy · Ad

The Best Gravy

This blog may contain affiliate links: disclosure.
Please see my suggested resources.

August 6, 2019 By Jennifer Lambert Leave a Comment

I want my kids to know how to make the Five Mother Sauces.

We make a pretty good marinara. We do a nice blender Hollandaise.

Gravy is a necessity to learn how to make well.

It’s very versatile. It goes with meats, starches, even a soup/stew base.

Our basic easy recipe is a great starter for a flavorful gravy.

You can add herbs, wine, beer, or other ingredients to make it unique to your tastes.

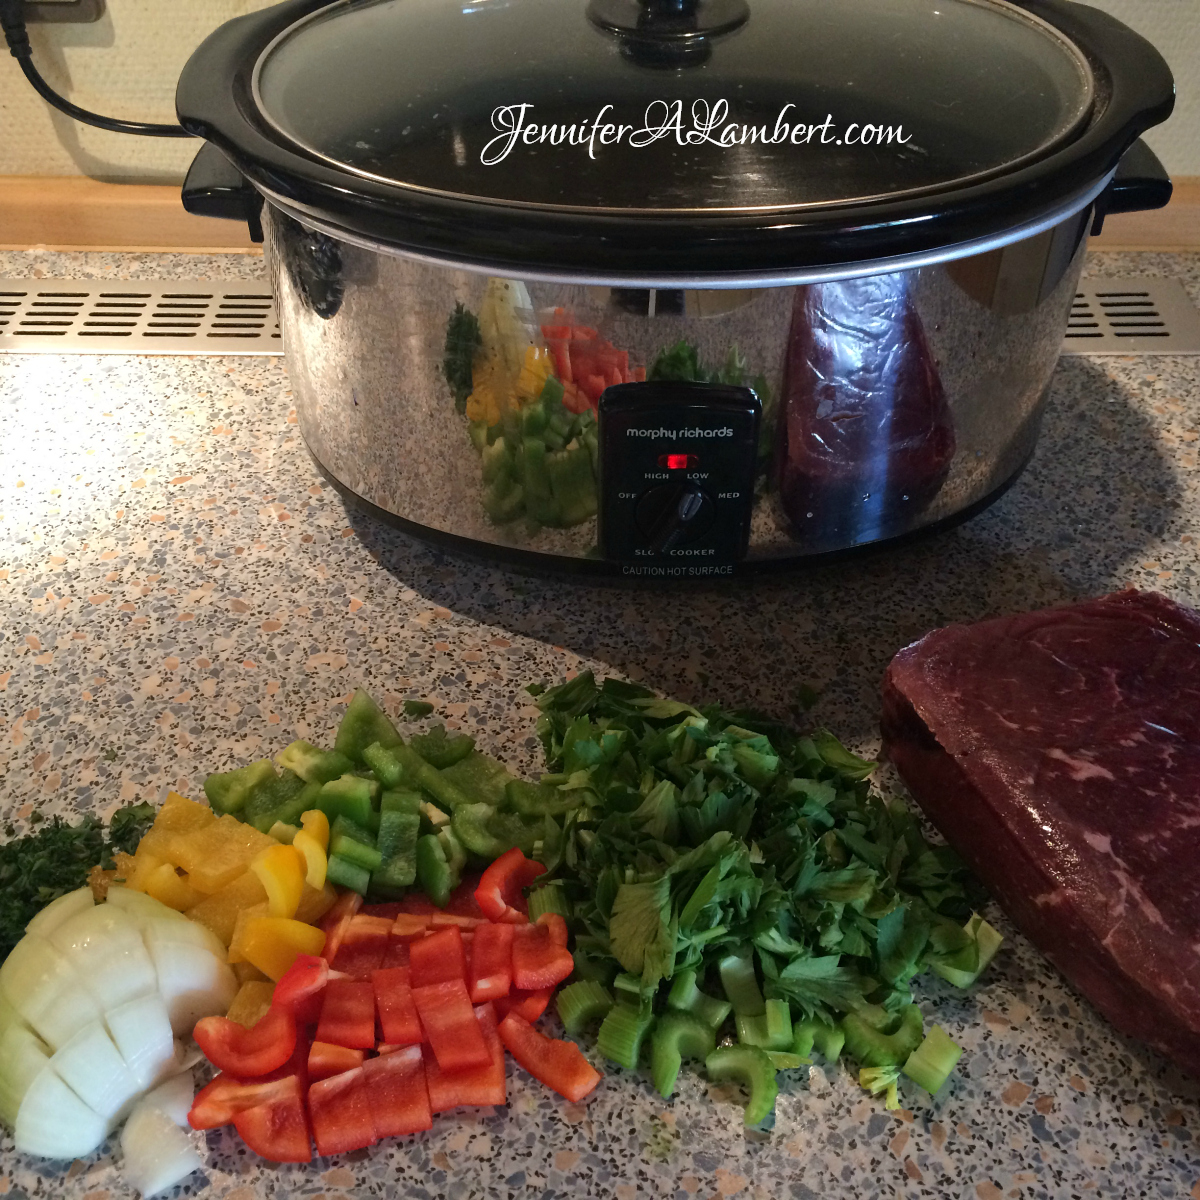
I do use pan drippings from a roast meat with a fat separator, but otherwise I use good quality stock in a neat little box.

Directions:

Begin with a roux of melted fat and flour until dry and almost crispy.

Add ketchup, mustard (preferably Dijon), Worcestershire. Trust me.

Quickly add stock and whisk – or beer, wine, whatever liquid you’re making that goes with your meal. You really don’t need more than a total of 2 cups.

For a nice brown gravy, I use 1 cup beef stock and 1/2 cup chicken stock.

For poultry gravy, I use all chicken or turkey stock. I usually add some half and half to this one.

Add more liquid if it gets too thick too quickly.

The key to shiny gorgeous gravy is whisking well over low heat until thick then straining out solids and adding just a pat of butter to melt before serving.

As you become more confident, you can experiment with what works and tastes good to you.

Print

Gravy

Ingredients

  • 4 T unsalted butter or fat of choice
  • 1/4 c AP flour
  • 1 1/2 c stock beef, chicken, turkey, veal, veggie
  • 1 T ketchup
  • 2 t Worcestershire sauce
  • 1 t Dijon mustard
  • garlic powder to taste
  • salt to taste
  • pepper to taste

Instructions

  1. Melt butter or fat in pan.

  2. Whisk in flour until browned a bit.

  3. Whisk in stock.

  4. Whisk in ketchup, Worcestershire, mustard, and spice.

  5. Bring to boil until thickened.

  6. Add cream, milk, more stock if it becomes too thick.

  7. Strain with fine mesh sieve to remove lumps. Press with spatula to get the good stuff.

  8. Add a pat of butter for a nice shine.

Share
Pin17
Share
17 Shares
You might also like:

Filed Under: Recipes Tagged With: gravy, recipe

KaTom Cooking Thermometer Review

This blog may contain affiliate links: disclosure.
Please see my suggested resources.

February 10, 2019 By Jennifer Lambert Leave a Comment

We love the features on this cooking thermometer from KaTom.

It has an on/off switch and handy dandy case so the therm stick doesn’t get bent or upset. It’s become our favorite!

We tested out the thermometer on this tasty Caribbean Chicken Recipe.

I used boneless skinless chicken breasts, but thighs would work well too.

Fun spice combos

Mix with oil and honey. I added seeded chopped jalapenos later so it’s not too spicy.

I marinated the chicken almost all day.

Alex did great grilling the checking the temperature!

Easy to read!

I grilled jalapenos from the marinade and they turned all sweet and delicious.

I served the chicken with yellow rice and black beans.

We’re really happy with the thermometer and chicken recipe!

Get the KaTom thermometer and the Caribbean chicken recipe.

Share
Pin1
Share
1 Shares
You might also like:

Filed Under: Reviews Tagged With: chicken, grilling, recipe, review

Homemade Pasta

This blog may contain affiliate links: disclosure.
Please see my suggested resources.

December 24, 2018 By Jennifer Lambert 9 Comments

Homemade pasta is really the best. There’s just nothing like it.

It’s super fun and easy for kids.

It is a little more time consuming than throwing a box of spaghetti into boiling water, but it’s oh so worth it.

It starts out kind of messy, with eggs and flour.

We really love our KitchenAid mixer and all the attachments.

Katie is really a pro when it comes to making pasta.

She folds and rolls, folds and rolls.

Everybody likes to cut the pasta into wide and thin noodles.

We also make our own sauces like marinara and alfredo and pesto.

We hardly ever have any leftover noodles!

5 from 3 votes
Print

Egg Noodles

Ingredients

  • 2 cups AP flour
  • 2 eggs
  • 4 egg yolks
  • 1 t salt

Instructions

  1. To Make the Dough: Pour flour in a mound. Make a well in the center of flour. Pour whole eggs, egg yolks, and salt into well. Use a fork to mix. Knead dough with hands until all is incorporated into a dough ball.

  2. Wrap ball of dough tightly in plastic wrap and rest on countertop for 30 minutes.

  3. To Roll the Pasta: Put down a sheet of parchment paper and dust lightly with flour. Cut dough into quarters. Set one quarter on work surface and re-wrap remaining dough. Flatten the quarter of dough into an oblong shape about 1/2 inch thick.

  4. Set pasta maker to widest setting and pass dough 3 times through the machine at this setting.

  5. Place dough on a lightly floured work surface. Fold both ends in so that they meet at the center of the dough, and then fold the dough in half where the end points meet, trying not to incorporate too much air into the folds. Flatten dough to 1/2-inch thick. Pass through the rollers 3 additional times.

  6. Reduce the setting by 1 notch and repeat. Continue passing the dough through the rollers, reducing the thickness by 1 setting each time until it reaches the desired thickness. It should now be very delicate and elastic to the touch and slightly translucent.

  7. Place rolled dough onto a work surface or baking sheet lightly dusted with flour or on parchment paper. Sprinkle with flour or line with parchment between folds to prevent sticking.

    Cover dough with plastic wrap or a kitchen towel to prevent drying, then repeat steps with remaining dough quarters. 

  8. To Cut Noodles: Adjust pasta machine to noodle setting of your choice. Working one dough segment at a time, feed dough through the pasta cutter. 

  9. Divide the cut noodles into individual portions, dust lightly with flour, and curl into a nest. Place on parchment-lined rimmed baking sheet and gently cover with kitchen towel until ready to cook. Pasta can be frozen directly on the baking sheet, transferred to a zipper-lock freezer bag, and stored in the freezer for up to three weeks before cooking. Cook frozen pasta directly from the freezer.

  10. To Cook: Bring a large pot of salted water to a rolling boil. Add pasta, stir gently with a wooden spoon, chopsticks, or a cooking fork, and cook, tasting at regular intervals until noodles are just set with a definite bite, about 1 1/2 to 2 minutes. Drain, toss with sauce, and serve.


Share
Pin24
Share
24 Shares
You might also like:

Filed Under: Recipes Tagged With: noodle, recipe

Canning Applesauce

This blog may contain affiliate links: disclosure.
Please see my suggested resources.

September 10, 2018 By Jennifer Lambert 8 Comments

Our neighbor across the street offered us as many apples as we could pick!

I think we got enough.

We made applesauce!

We cored and sliced apples and boiled them down with some water. This can also be done in a slow cooker.

You can add spices like cinnamon or nutmeg, sugars, or leave it plain.

We love our KitchenAid mixer and attachments!

Look at that lovely golden applesauce.

The grinder spits out the peels and gives us smooth applesauce. So much less work!

We boil it down a little more. You can adjust any seasonings at this point.

We poured it into jars and did a water bath canning. They all popped!

This will last us a long time!

Check out our super simple applesauce recipe:

5 from 2 votes
Print

Applesauce

Ingredients

  • 12 lbs apples, peeled, cored, quartered (about 30-35)
  • 1-2 cups water
  • 4 T lemon juice
  • 1-3 cups sugar optional
  • 1/4 cup cinnamon optional

Instructions

  1. Combine apples with just enough water to prevent sticking in a large stainless steel saucepan. Bring to a boil over medium-high heat. Reduce heat and boil gently, stirring occasionally, for 5 to 20 minutes, until apples are tender. Remove from heat and let cool slightly, about 5 minutes.

  2. Transfer apples, working in batches, to a food mill or a food processor fitted with a metal blade and purée until smooth.

  3. Return apple purée to saucepan. Add sugar, if using, and lemon juice. Bring to a boil over medium-high heat, stirring frequently to prevent sticking. Maintain a gentle boil over low heat while filling jars.

  4. Ladle hot applesauce into hot, clean jars leaving 1/2 inch headspace. Remove air bubbles. Wipe rim. Center lid on jar. Apply band until fit is fingertip tight.

  5. Process jars in a boiling water canner for 20 minutes. Remove jars and cool. Check lids for seal after 24 hours. Lid should not flex up and down when center is pressed.

Resources:

  • Not Your Mama’s Canning Book: Modern Canned Goods and What to Make with Them by Rebecca Lindamood
  • Ball Complete Book of Home Preserving
  • Water Bath Canner
  • Enamelware Water Bath Canning Pot Set
  • Artisan Tilt-Head Stand Mixer
  • Grinder Attachment for KitchenAid Stand Mixers
  • Fruit and Vegetable Attachment Strainer for KitchenAid Stand Mixers
Share
Pin4
Share
4 Shares
You might also like:

Filed Under: Recipes Tagged With: apples, canning, recipe

Canning Tomato Sauce

This blog may contain affiliate links: disclosure.
Please see my suggested resources.

September 3, 2018 By Jennifer Lambert 14 Comments

Fresh tomatoes warm from the sunny garden are a favorite scent and flavor.

I miss my garden with Roma and Marzano tomatoes from my Utah garden.

We had so many tomatoes that year, we taught ourselves how to can tomato sauce so we had that fresh delicious flavor in the dead of winter.

Now we buy the tomatoes, on sale, ready to sauce, at local farmers markets.

We love this slow cooker marinara.

It’s super easy and my daughter is the resident marinara maker the last two years! Here she is last year, making sauce.

We cook the tomatoes and other vegetables with dried spices in the slow cooker for about 12 hours. Fresh spices are great for finishing recipes, but they become bitter when cooked down. We reduce it if it’s too thin. Sometimes, I adjust the flavor by adding a little more sugar or some lemon juice.

We then process it with our KitchenAid attachments and water bath can it.

Super simple and we use it on pizza, as a base for pasta sauces, and in other recipes.

We can never have too much!

Thanks to Ball canning for all the lovely jars!

5 from 3 votes
Print

Slow Cooker Marinara

Cuisine Italian
Prep Time 5 minutes
Cook Time 12 hours
Total Time 12 hours 5 minutes
Servings 6 cups

Ingredients

  • 8 large tomatoes quartered
  • 1/2 sweet onion roughly chopped
  • 6 cloves garlic
  • 3 T olive oil
  • 1 bay leaf
  • 2 t basil
  • 1 t oregano
  • 1 t marjoram
  • 1 t sea salt
  • 1/2 t black pepper
  • 1.5 t sugar or honey
  • 2 t Balsamic vinegar

Instructions

  1. Mix all ingredients in slow cooker and set on low for 12 hours. Your kitchen will smell amazing!
  2. Process in batches in a food processor and strain through a food mill to get rid of peels and seeds – or use the handy dandy KitchenAid attachment.
  3. If the sauce is too thin, we reduce it (thicken) in a big chili or stock pot on the stovetop for about 30 minutes to an hour. I adjust seasoning at this time too.
  4. Freeze sauce in manageable amounts in zipper bags or plastic containers – or use jars in a bath canner.

Resources:

  • Not Your Mama’s Canning Book: Modern Canned Goods and What to Make with Them by Rebecca Lindamood
  • Ball Complete Book of Home Preserving
  • Water Bath Canner
  • Enamelware Water Bath Canning Pot Set
  • Artisan Tilt-Head Stand Mixer
  • Grinder Attachment for KitchenAid Stand Mixers
  • Fruit and Vegetable Attachment Strainer for KitchenAid Stand Mixers
Share
Pin16
Share
16 Shares
You might also like:

Filed Under: Recipes Tagged With: canning, recipe

Our Favorite Salads

This blog may contain affiliate links: disclosure.
Please see my suggested resources.

August 20, 2018 By Jennifer Lambert 19 Comments

We love salads and have one at dinner almost every night.

I grew up with plain ole iceberg and carrots, but was delighted to discover so many healthier and tasty options as I grew up and ate at friends’ houses or traveled.

Salads are great during hot summer months when the veggies are in season, fresh from the garden.

Some of our favorite salads:

Greek:

Kalamata olives, cucumbers, tomatoes, feta, and sometimes red onion and bell pepper…with or without lettuce. With oregano and olive oil and red wine vinegar.

Italian:

We fell in love with Italian salads during our travels. There are regional delicacies and we love em all.

Florence had fennel, carrots, and grapes or raisins with Romaine and a simple olive oil dressing. So sweet and crunchy!

Venice had olives, oranges, and arugula. It was unique.

Rome had peppers, olives, onions, tomatoes, and Romaine. Yes, kinda like Olive Garden {gasp!} but it was all so fresh and lovely.

German:

Many German salads have lots of pickled veggies, sweet corn, and yogurt dressing or Thousand Island.

Grilled:

The texture and flavor of grilled lettuce is unique and amazing.

Don’t cut all the way through. Drizzle with oil and get a little char on a gas or charcoal grill. Add cheese, bacon, and tomatoes. Easy!

Fruity Nutty

I love berries and walnuts with spinach.

Also, I love pomegranate, apples or pears, almonds or walnuts over romaine.

These make great meal salads – with or without some chicken.

Wedge:

These seem so fancy in restaurants.

Bleu cheese, bacon, and tomatoes on iceberg slices are just so pretty.

I like to make it even more special by adding a drizzle of balsamic vinegar and grilling the tomatoes.

Salads can be so versatile. They can be an appetizer, side dish, or a full meal – with or without added proteins. We have fun playing with colors and textures.

What’s your favorite salad?

Share
Pin42
Share
42 Shares
You might also like:

Filed Under: Recipes Tagged With: recipe, salad, summer

Naked Nutrition Matcha Review

This blog may contain affiliate links: disclosure.
Please see my suggested resources.

June 19, 2018 By Jennifer Lambert Leave a Comment

I LOVE Naked Nutrition’s brand new Matcha Protein Powders!

There are two versions of the product (one made with whey, and the second with vegan pea protein) and all kinds of amazing recipes!

I LOVE that it only has TWO INGREDIENTS!

There’s no odor or aftertaste in either the pea or whey protein powders.

I have a smoothie every morning and often throughout the day.

I’m often vegan/vegetarian until dinnertime. It helps me to maintain a healthy weight and have lots of energy.

Matcha just makes it all better!

My favorite smoothies:

Wonderful Berry Energy Smoothies

Can easily make this vegan without yogurt. Can use any or no plant milk or liquid.

Mango Pina Colada Smoothie

Can easily make this vegan by using the pea protein + matcha powder.

There are A TON of other products from Naked Nutrition and healthy recipe options (like no carb pizza crust, protein packed quiches, and much more) as well if you are looking for additional options for both sweet and savory items with a healthy twist.

In addition to being delicious and a great way to pack lean, clean protein into all kinds of recipes – Naked Nutrition has pledged to donate between 15-100% (yes, you read that right!) of sales from these two products to the ALS Association’s Golden West Chapter/ Team Nanci for the rest of 2018 in an effort to help raise money and awareness for the organization in hopes of helping to find a cure for this awful disease.

Those affected by ALS will very often be robbed of a simple joy that we seem to have in common (eating solid food), so while it certainly may not be as yummy as Matcha Chocolate Chip muffins (recipe below!), these and all of the other pure and additive-free products the brand offers help to make the smoothies and shakes that those with ALS almost exclusively get their nutrition from a little more fun, and a lot more tasty.

“Matcha is known for being an antioxidant powerhouse so we thought it would be a great idea to support another powerhouse – celebrity publicist Nanci Ryder – by helping to raise money for ALS research,” continued Zieminski.

About Naked Pea + Matcha and Whey + Matcha

These first-to-market, non-GMO protein powders feature the superior health benefits of organic Japanese matcha. This ceremonial ground green tea leaf powder is loaded with healthful antioxidants that help boost metabolism, burn calories and detoxify the body.

Naked Pea + Matcha features a vegan protein made exclusively of raw yellow peas sourced from U.S. and Canadian farms, and Naked Whey + Matcha is made using pasture-fed cows’ milk from small, California dairy farms. Naked Nutrition leverages careful manufacturing processes to create a non-denatured whey loaded with essential amino acids, glutathione and clean protein.

The Naked Pea + Matcha Difference:

  • Vegan, plant-based protein
  • Pea protein is made exclusively from farms in the United States and Canada
  • No artificial sweeteners, flavors or colors
  • 22 grams of protein and 4.9 grams of branched chain amino acids (BCAA) per serving*
  • Only two ingredients: yellow pea protein and organic Japanese matcha powder
  • Non-GMO, soy-free, dairy-free and gluten-free
  • Environmentally-friendly farming practices

The Naked Whey + Matcha Difference:

  • Made from pasture-fed cows’ milk from small dairy farms in California
  • No artificial sweeteners, flavors, or colors
  • 22 grams of protein and 5.3 grams of BCAA’s Per Serving*
  • Only two Ingredients: Whey Protein and organic Japanese matcha powder
  • Non-GMO, soy-free, gluten-free
  • No rBGH or rBST
  • Cold processed
  • Acid and bleach-free processing

*Nutritional values are verified by independent third-party testing.

Print

Matcha Muffins with Chocolate Chips

Course Breakfast
Cook Time 20 minutes
Total Time 20 minutes
Servings 12 muffins

Ingredients

  • 1 3/4 cups 1 3/4 cups unbleached flour
  • 1/4 cup Naked Whey + Matcha
  • 1 1/2 teaspoons baking powder
  • 1 1/2 teaspoons baking soda
  • 1 teaspoon kosher salt
  • 1 Tablespoon matcha powder
  • 1/2 cup coconut palm sugar plus 1 Tablespoon
  • 1 1/3 cups almond milk
  • 1 large egg
  • 1/3 cup vegetable oil
  • 1 1/2 teaspoons vanilla
  • 1/2 teaspoon almond extract
  • 1 cup chocolate chips

Instructions

  1. Preheat the oven to 400°. Line and grease a muffin pan.
  2. In a large bowl, whisk together the flour, Naked Whey + Matcha, baking powder, baking soda, salt, matcha powder and 1/2 cup of sugar.
  3. In a separate bowl, whisk together the almond milk, egg, oil and extracts.
  4. Add the wet ingredients into the dry ingredients and stir to combine. Fold in the chocolate chips.
  5. Spoon the batter into the muffin cups. Sprinkle the tops with the remaining tablespoon of sugar.
  6. Bake for 16-18 minutes, until the tops are lightly browned. Let cool slightly in the pan and then transfer to a wire rack to cool completely.
Share
Pin8
Share
8 Shares
You might also like:

Filed Under: Reviews Tagged With: recipe, review, smoothie

What We Eat Every Week

This blog may contain affiliate links: disclosure.
Please see my suggested resources.

April 30, 2018 By Jennifer Lambert 13 Comments

We actually eat almost the same things every week.

It helps with planning and grocery shopping.

I use Checkout 51 and Ibotta apps along with Kroger sales and coupons to plan our week.

We buy most of our fruits and veggies and other items at Kroger. I occasionally buy organic. I plan to buy more from local farmers markets and perhaps growing some of our own this year.

We buy almost all our meats from a local butcher shop. I like knowing our meat is local and without hormones and other additives. They live happier lives and we’re happier not consuming mass-produced feedlot meat.

What We Eat Every Week:

Breakfasts

My husband usually makes breakfast for the kids on weekends and lets me sleep in. They love egg hash with sausage and potatoes, pancakes, waffles…all the things I seldom make. Tori’s favorite is eggs Benedict.

My typical weekday breakfasts for the kids are a combo of scrambled eggs, Oscar Mayer natural bacon, Jones sausage links or patties, steel-cut oatmeal, 10-grain porridge, cheesy grits, Annie’s canned biscuits with jelly, occasionally homemade muffins or scones.

Katie sometimes makes a lovely breakfast cake or muffins.

The girls sometimes get up late and have the yummy new protein Cheerios.

I have coffee and sometimes what the kids are having, but usually a mango-spinach or berry smoothie. Sometimes yogurt with fruit and homemade granola.

Lunches

Katie loves to make these little tortilla pizzas. Quesadillas are an easy lunch that kids can make.

We often have sandwiches or charcuterie platters.

Sometimes, we have leftovers, but we’re getting to the point there aren’t many! Sometimes, we have a fancy tea time with cute little sandwiches. When the kids were little, we did Muffin Tin Monday.

Dinners…

Sunday

We usually have leftovers or something quick prepped from the freezer.

Twice a month, the girls participate in church activities in the evening, so we don’t bother making a big fancy meal most Sundays. Sometimes, we even get some takeout.

Monday

I’m usually rested after the weekend, so I go all out and prepare something special.

I’ll go to the store and get fish to try or something a little different than our norm or that takes more time.

Sometimes, we have huge salads with grilled or leftover meat.

We like chicken Marsala.

Tuesday

Tacos, duh.

I make our own taco seasoning and use it in lots of dishes. Sometimes, I make a taco noodle casserole or baked chicken enchiladas.

Sometimes, we mix it up and have Asian tacos.

Wednesday

Usually something in the slow cooker, like a stew or roast. Sometimes something that’s quick and easy that can be thrown together last minute.

Swiss steak is delicious with lots of veggies.

Pork tenderloin is super easy and flavorful.

Everyone loves these Asian slow cooker pork ribs.

Our favorite soups: cream of vegetable, dill chicken, ham and bean.

Thursday

Usually something easy like pasta, potatoes, or rice and a grilled meat and steamed veggies. The kids have an architecture class at the library and it’s about a 30 minute drive, so we’re home about 7 and my husband finishes up what I’ve prepped.

Cashew chicken is a go-to that’s really easy to make.

I marinate meat in bags and it grills up super nice! These are great for camping, busy weeks, or grabbing a bag from the freezer when I’m out of ideas.

We reviewed eMeals one year and got some fun new meal ideas.

Friday

Homemade pizza. With a movie.

I usually have sliced tomatoes, sliced mozzarella, oregano basil garlic, with a few dollops of pizza sauce.

My husband and two kids like sausage and/or pepperoni. Two girls like sausage, pepperoni, onions, and red bell peppers.

Saturday

We often grill steaks or hamburgers.

When my husband travels out of town or works late, I make the things he doesn’t like – like tuna casserole or turkey divan, and lots of bell pepper dishes.

I’m also incorporating more vegetarian dishes into our family’s recipe repertoire.

We seldom dine out. I am usually disappointed at the quality for the price. I don’t like not knowing where my food comes from or what’s in it.

And I like that I can eat dinner in my loungewear.

There isn’t much that I can’t make myself at home – better and cheaper.

Resources:

  • The Case Against Sugar by Gary Taubes
  • The Big Fat Surprise: Why Butter, Meat and Cheese Belong in a Healthy Diet by Nina Teicholz
  • The Great Cholesterol Myth, Revised and Expanded: Why Lowering Your Cholesterol Won’t Prevent Heart Disease–and the Statin-Free Plan that Will by Jonny Bowden and Stephen T. Sinatra
  • Animal, Vegetable, Miracle: A Year of Food Life by Barbara Kingsolver
  • Food Matters: A Guide to Conscious Eating with More Than 75 Recipes by Mark Bittman
  • VB6: Eat Vegan Before 6:00 to Lose Weight and Restore Your Health . . . for Good by Mark Bittman
  • In Defense of Food: An Eater’s Manifesto by Michael Pollan
  • The Whole30: The 30-Day Guide to Total Health and Food Freedom by Melissa Hartwig Urban and Dallas Hartwig
  • 100 Days of Real Food: Fast & Fabulous: The Easy and Delicious Way to Cut Out Processed Food by Lisa Leake
Share
Pin2
Share
2 Shares
You might also like:

Filed Under: Recipes Tagged With: food, frugal, homemaking, meal plan, recipe

Easy Lo Mein

This blog may contain affiliate links: disclosure.
Please see my suggested resources.

March 12, 2018 By Jennifer Lambert 7 Comments

We love lo mein but we can’t afford to get takeout every week nor do we want MSG that’s often in it.

My teen daughter complained the other day that holidays at our house are boring because we don’t ever have special meals. She said we cook too well at ordinary times to do anything extraordinary at holidays.

I’m hurt, but she’s not wrong.

This easy lo mein is pretty healthy and natural and comes together in a pinch!

It’s pretty easy to make lo mein at home and we add in the veggies and meats we like, customized for everyone.

I usually buy a bag of shredded carrots. I slice onions and bell peppers very thin.

The kids like the crunch of water chestnuts and baby corn.

You can add any veggie you like to customize.

I add some napa cabbage or some greens to steam as the last step.

I often top the bowls of lo mein with chopped green onions and sesame seeds.

I often use leftover chicken or stirfry up a quick batch of marinated chicken breast or shrimp. You can use tofu or any or no protein for frugal meals.

We often just use a box of cheap spaghetti, but the Asian lo mein noodles really are superior. I boil and drain it and toss it with some sesame oil while I saute meat and veggies.

It’s best to do things in batches and then toss it all together at the end so it’s fresh and hot.

I tend to make a quick sesame teriyaki sauce that pleases everyone’s taste buds. Those of us who like a bit of spice just add some chili garlic sauce at the table. Chopped cilantro is also nice.

This quick and easy meal is a crowd-pleaser.

Print

Lo Mein

Course Main Dish
Cuisine Asian
Prep Time 10 minutes
Cook Time 10 minutes
Total Time 20 minutes
Servings 6

Ingredients

Lo Mein

  • 1 package spaghetti
  • 1 can water chestnuts, sliced or chopped
  • 1 can baby corn, sliced
  • 1/2 bag chredded carrots
  • 1/2 head Napa cabbage, chopped or baby bok choy or spinach or whatever
  • 1/2 medium bell pepper, sliced
  • 1/2 medium onion, sliced
  • 1/2 cup mushrooms, sliced
  • 2 chicken breasts, sliced into bite-sized pieces or shrimp or pork or beef or tofu

Teriyaki Sauce

  • 1/2 c Tamari
  • 1/4 c sesame oil
  • 1 clove crushed garlic
  • 1 t grated ginger
  • 1/8 c brown sugar
  • 1/8 c Mirin or sherry

Instructions

  1. Marinate chicken or other protein: 2 T soy sauce and 1 T sesame oil. Add 1 T sugar. Toss in 1-2 T cornstarch. It should make a paste coating the meat.
  2. Boil a pot of salted water. Prepare noodles according to package instructions.
  3. Heat 1-2 T peanut or other mild oil in wok or large pan. Saute carrots and onions. Add peppers, water chestnuts, corn, mushrooms. Drain vegetables in a colander or on paper towels.
  4. Heat 1-2 T oil in pan. Saute chicken in batches until cooked through. Drain in colander or on paper towels.
  5. Heat sauce in pan and combine with noodles, vegetables, chicken. Use tongs to gently coat every noodle with the sauce.
  6. Add in Napa cabbage or other greens to steam the last minute. Divide into pretty bowls. Sprinkle with chopped green onions and/or sesame seeds. Season with chili garlic sauce to taste.
Linking up: Holiday Journey, Modest Mom, Darling Downs Diaries, Blogghetti, Life of Faith, Squishable Baby, MaryAndering Creatively, GodSized Dreams, Holley Gerth, Inspiration for Moms, Simple Life for a Fire Wife, Lori Schumaker, Trekking Thru, That Recipe, Timeless Mama, Home Stories A to Z, Live Randomly Simple, Teaching What is Good, LouLou Girls, April Harris, Jaime Wiebel, Wise Woman, Jessi’s Design, Ducks in a Row, Marilyn’s Treats, Soaring with Him, Mississippi Mom, Sarah Frazer, Becoming Press, Our Three Peas, Raven Would, Bringing up Georgia, Breakthrough Homeschooling, Gingersnap Crafts, Journeys in Grace, Jennifer Dukes Lee, Life Beyond the Kitchen, A Bountiful Love, Life with Lorelai, Creative K Kids, Sugar Spice and Family Life, Our Mini Family, Coffee With Us3, Being a Wordsmith,
Share
Pin23
Share
23 Shares
You might also like:

Filed Under: Recipes Tagged With: noodle, recipe

Tortilla Pizzas

This blog may contain affiliate links: disclosure.
Please see my suggested resources.

May 24, 2017 By Jennifer Lambert 21 Comments

Tortilla pizzas are a super easy meal that kids can make themselves!

We love using leftover wheat homemade tortillas, but storebought ones are fine.

These are great to make when we travel or during PCS season when our household goods are all packed up and shipped. They’re easy and don’t require much prep or equipment.

It’s super easy with all-natural breakfast sausage and a shredded Italian cheese blend. We always have those on hand.

You can add more toppings, but these simple tortilla pizzas are just super easy and crowd pleasers.

My 10-year-old daughter, Katie, loves to make these for herself and her siblings for lunches or snacks.

We had three storebought tortillas, just enough for a light lunch. The homemade ones don’t last long around here!

Kraft cheese isn’t ever my first choice, but it’s what’s available to us from the commissary and melts better than other choices from either the commissary or German stores.

Katie lovingly spreads the sauce on the tortillas. She’s so much more careful than I’d be!

She evenly distributes the sausage.

She puts on just enough cheese.

I love the height of my oven, that makes it easy to get pans in and out!

She sets our retro timer for 10 minutes.

And then: delicious, melty tortilla pizzas!

I like mine with onions and peppers.

I imagine trying lots of fun new flavors. These could great appetizers for a party too!

The crispy tortilla crust is amazing.

It’s hardly a recipe with only 4 or so ingredients…

Print

Tortilla Pizzas

A super easy and frugal meal that kids can make themselves! You can add whatever toppings you like!
Cuisine Italian
Prep Time 5 minutes
Cook Time 10 minutes
Total Time 15 minutes
Servings 4

Ingredients

  • 4 tortillas
  • 4 T pizza sauce
  • 3 oz sausage
  • 4 oz Italian cheese

Instructions

  1. Preheat oven to 400*
  2. Brown sausage in a pan.
  3. Spread pizza sauce on tortillas. Sprinkle sausage on. Spread cheese on top.
  4. Bake in oven for about 10 minutes.


Share
Pin90
Share
90 Shares
You might also like:

Filed Under: Recipes Tagged With: frugal, pizza, recipe

  • « Previous Page
  • 1
  • 2
  • 3
  • 4
  • 5
  • …
  • 7
  • Next Page »
Suggested ResourcesCheckout 51Fetch

Archives

Popular Posts

10 DIY Gifts with Essential Oils10 DIY Gifts with Essential Oils
Natural Remedies for HeadacheNatural Remedies for Headache
10 Natural Remedies to Keep on Hand10 Natural Remedies to Keep on Hand
Henna Hands CraftHenna Hands Craft
Homemade Turkey Divan CasseroleHomemade Turkey Divan Casserole
This website uses cookies to improve your experience. We'll assume you're ok with this, but you can opt-out if you wish.Accept Reject Read More
Privacy & Cookies Policy

Privacy Overview

This website uses cookies to improve your experience while you navigate through the website. Out of these, the cookies that are categorized as necessary are stored on your browser as they are essential for the working of basic functionalities of the website. We also use third-party cookies that help us analyze and understand how you use this website. These cookies will be stored in your browser only with your consent. You also have the option to opt-out of these cookies. But opting out of some of these cookies may affect your browsing experience.
Necessary
Always Enabled
Necessary cookies are absolutely essential for the website to function properly. This category only includes cookies that ensures basic functionalities and security features of the website. These cookies do not store any personal information.
Non-necessary
Any cookies that may not be particularly necessary for the website to function and is used specifically to collect user personal data via analytics, ads, other embedded contents are termed as non-necessary cookies. It is mandatory to procure user consent prior to running these cookies on your website.
SAVE & ACCEPT