Jennifer Lambert

A Sacred Balance

Visit Us On FacebookVisit Us On PinterestVisit Us On InstagramVisit Us On Linkedin
  • Homeschool
    • Book Lists
    • How Do We Do That?
    • Notebooking
    • Subjects and Styles
    • Unit Studies
  • Travel
    • Europe
      • Benelux
      • France
      • Germany
      • Greece
      • Ireland
      • Italy
      • London
      • Porto
      • Prague
    • USA
      • Chicago
      • Georgia
      • Hawaii
      • Ohio
      • Utah
      • Yellowstone and Teton
  • Family
    • Celebrations
    • Frugal
  • Military Life
    • Deployment
    • PCS
  • Health
    • Recipes
    • Essential Oils
    • Fitness
    • Mental Health
    • Natural Living
    • Natural Beauty
  • Faith
  • About Me
    • Favorite Resources
    • Advertising and Sponsorship
    • Policies
  • Reviews

© 2025Jennifer Lambert · Copyright · Disclosure · Privacy · Ad

Forest Berries

This blog may contain affiliate links: disclosure.
Please see my suggested resources.

July 21, 2016 By Jennifer Lambert 18 Comments

We went foraging in our forest for wild berries.

Forest Berries and Foraging

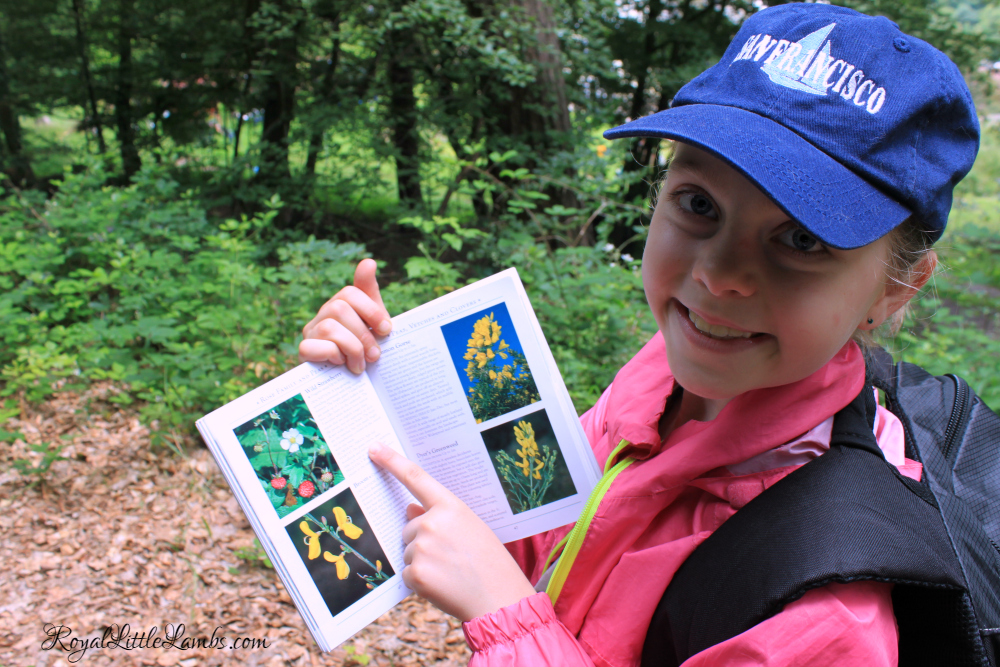
The girls have been interested in wildflowers for a while, so we acquired some guidebooks to go exploring and identifying plants.

Forest Berries Wildflower Book

We have lots of trails in the woods near our house, meandering all through the Pfalzwald. We love the easy walks to look at the flowers and listen to the birds. There’s even a creek that runs through for us to play in and look for newts.

The blackberries are just now flowering and we haven’t seen any blueberries or raspberries.

The wild strawberries or forest berries (Waldbeeren in German!) are just now ripening along the trails.

First Forest Strawberry

We got quite a bit of ripe forest berries on our hike!

Forest Berries
We brought our harvest back and added sour cherries to our kombucha and snacked on the wild strawberries.

The wild strawberries are super sweet and the kids prefer them to store-bought strawberries because the seeds aren’t so big and they’re so cute and tiny.

We also went on another walk later in the week and harvested sweet cherries to make into sauce.

Safety first! When foraging, you have to be 150% sure of correct identification. Books aren’t the most reliable ways to go foraging. It’s better to have an educated local guide to help differentiate between similar plants. We saw a plant that looked like a bilberry, but I was too nervous to try!

We made Blueberry Buckle for breakfast one morning, but with storebought berries.

Blueberry Buckle Kids in the Kitchen

Katie loves baking and is quite adept at breakfast cakes!

Kids in the Kitchen Blueberry Buckle

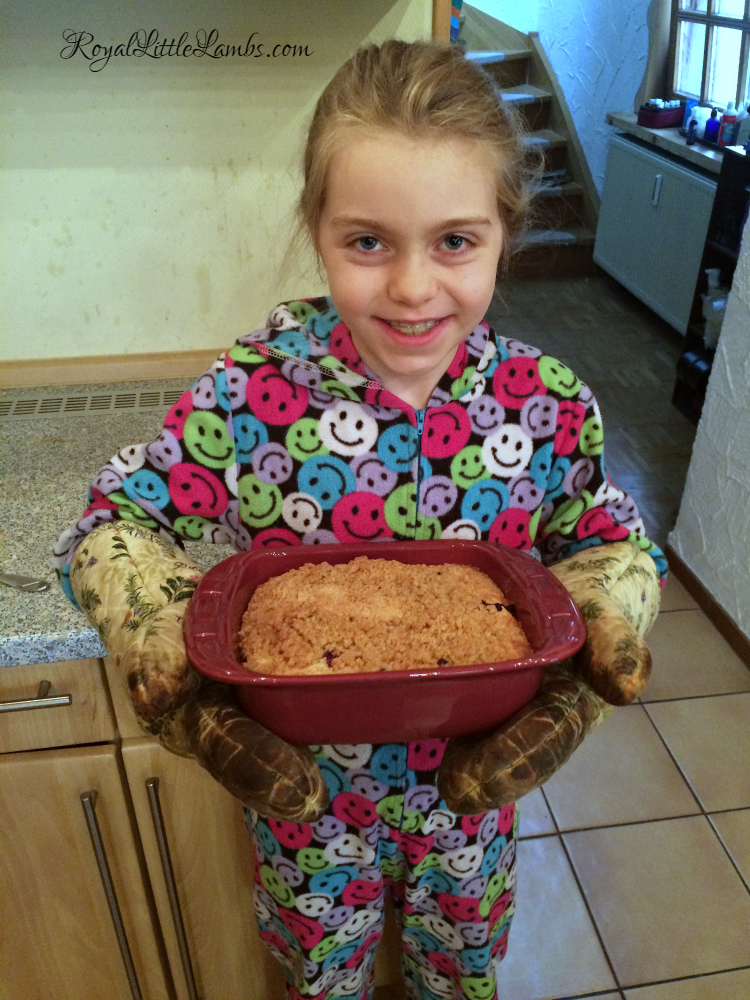
I really love the little pop of ginger in this blueberry buckle. It freshens the taste of the cake and berries.

Blueberry Buckle
Print

Blueberry Buckle

Course Breakfast
Cuisine cake
Prep Time 10 minutes
Cook Time 35 minutes
Total Time 45 minutes
Servings 8 slices

Ingredients

Cake

  • 2 cups flour AP works fine, but we like cake or pastry flour
  • 1 t baking powder
  • 1/2 t salt
  • 1/2 t ginger ground is fine, but fresh grated adds kick!
  • 2 T butter
  • 3/4 c sugar
  • 1 egg
  • 1/2 c milk
  • 1 small package blueberries fresh or frozen (about 1.5 cups)

Topping

  • 1/2 c sugar we used brown sugar for more depth
  • 1/3 c flour
  • 1/2 t nutmeg
  • 2 T butter chilled works better
More recipes:Strawberry Pretzel Salad/Dessert | The Gifted GabberHealthy Frozen Raspberry and Yogurt Dessert {Dairy-Free & Gluten-Free} | Living Montessori NowLinking up: Crafty Moms Share, Ask Latisha, The Crazy Organized Blog, Oh My Heartsie Girl, Denise Designed, Saving 4 Six, Bloghetti, Life of Faith, Books and Giggles, What Joy is Mine, Marilyns Treats, Modest Mom, A Fresh Start on a Budget, Inspiration for Moms, Written Reality, Strangers and Pilgrims on Earth, Smart Moms Smart Ideas, Darling Downs Diaries, MaryAndering Creatively, Practical Mom, Curly Craft Mom, Holly Barrett, Cornerstone Confessions, VMG206,  Sarah Celebrates, RCH Reviews, Simple Life of a Fire Wife, Sherry Wilson, ABC Creative Learning,  Raising Homemakers, Jamiffer, Penny’s Passion, Adventures of Mel, Lamberts Lately,  I Choose Joy, Frog’s Lilypad, Pat and Candy, Bloom Designs, Pocketful of Posies, A Little R&R, Live Laugh Rowe, Katherine’s Corner, The Natural Homeschool, Crystal and Comp, A Bountiful Love,  A Bowl Full of Lemons, Feeding Big, Christian Montessori Network, Design Dining and Diapers, Sincerely Paula, OMHG,  Create with Joy, The Diary of a Real Housewife, Life with Lorelai, Cooking on a Budget, Happy and Blessed Home, Sugar Spice and Family Life, Our Daily Craft, Being a Wordsmith,
Share
Pin5
Share
5 Shares
You might also like:

Filed Under: Recipes Tagged With: homeschool, nature study, recipe, summer

Cool Fruit Ices

This blog may contain affiliate links: disclosure.
Please see my suggested resources.

June 28, 2016 By Jennifer Lambert Leave a Comment

Our summers are short here in Germany.

It’s often rainy and cloudy and temperatures can drop suddenly. Our plans have to remain flexible.

When the sun shines and it’s warm, we rush to the pools, barefoot parks, and make fun, cool treats to enjoy!

My girls love simple fruit ices that combine real fruit into a delicious cool treat to beat the heat.

We don’t have air conditioner, so staying cool in summer can be a challenge.

This week, we combined fresh watermelon, lime juice, honey, and ice in the blender to cool off.

I sliced and chopped the juicey watermelon and added it to the blender.

Katie added ice and honey and lime juice.

Making Ices

She likes to push the “on” button.

Blending Ices

These ices are super simple and not too sweet.

Pretty Straw in Watermelon Ice

We also love making ices with berries. These are also fun to freeze in silicone tubes!

Easy Watermelon Ices

Cool real fruit treats are healthy in the summertime or anytime. Also great with additions of strawberries, pineapple, or mint!

Print

Fruit Ices

Cuisine Beverage
Prep Time 5 minutes
Total Time 5 minutes
Servings 4 cups

Ingredients

  • 1/2 small watermelon seedless (If you can’t get seedless, you might need to blend and strain the watermelon first.)
  • 1-2 T honey or agave
  • 1-2 T lime or lemon juice
  • 1 cup ice

Instructions

  1. Cut the watermelon flesh from the rind. Cube the watermelon and add to the blender.
  2. Add sweetener, juice, and ice to blender and blend until smooth and frothy.
  3. Pour into pretty cups or jars with fun straws and ENJOY!


Check out the other cool treats!

Strawberry-Peach Ice Cream Float | The Gifted Gabber

Kids’ Kitchen: Berry Yummy and Healthy Protein-Rich Popsicles | Living Montessori Now

Strawberry Creamsicles | Kitchen Counter Chronicles

Simple Watermelon Popsicles  |  Royal Baloo

Homemade Ice Cream in a Bag | Mess for Less

Share
Pin4
Share
4 Shares
You might also like:

Filed Under: Recipes Tagged With: recipe, summer

Tea Sandwiches

This blog may contain affiliate links: disclosure.
Please see my suggested resources.

May 24, 2016 By Jennifer Lambert Leave a Comment

It’s been cold and rainy here all month-long. We even had frost in the mornings last week!

The kids loved having a fancy tea at Ashford Castle, so we decided to recreate those yummy sandwiches in our own home.

We love having a fancy tea time for lunch on rainy days and listening to classical music.

I gathered the ingredients for several kinds of tea sandwiches:

  • Smoked Salmon
  • Turkey Avocado
  • Cucumber
  • Peanut Butter and Honey
Mise en Place

The peanut butter and honey whipped together is quite special.

I mixed half a package of cream cheese and Greek yogurt (that looks like 1/2 cup, yes?) with chopped chives.

I love that my German friends call cream cheese “The cheese that is not cheese.”

Cream Cheese with Chives and Yogurt

I added some salt and pepper. I couldn’t get it very smooth. I think letting it sit out to get room temperature is key.

Chive Cream Cheese

I mashed avocado with salt and pepper. You can add a little lemon or lime juice if you’re worried about it oxidizing. Or you can just use a container of premade guacamole.

Mashed Avocado

We had some leftover curry turkey breast that works so well! I miss this from our German butcher shop.

Curry Turkey

For pretty, trim the crusts off the bread. Yes, I used icky store-bought bread. We almost never do. But the German stuff is much cleaner than the American bread. And I know there are some organic ones that are healthier.

Crustless Bread

I sliced the cucumbers thin. I didn’t peel them first.
Don’t mind my nails. I’ve been gardening. And I’m a mom. I haven’t had a mani-pedi in over 3 years.

Thin-Sliced Cucumbers

I used a biscuit cutter to make some bread rounds.

Round Bread

Then I assembled the sandwiches.

I used the cream cheese mixture with the smoked salmon.

I also chopped spinach and parsley and added that for a touch of green and flavor.

I think next time, I need some more seasoning. They were just a little bland.

Assembling Smoked Salmon Sandwiches

The cucumber sandwiches were perfect with the spinach and parsley.

Watercress is more traditional, but I couldn’t find any this week.

Assembling the Cucumber Sandwiches

I roll the turkey avocado sandwiches with sliced almonds for an extra special touch. They’re Liz’s favorite.

I used a dab of the cream cheese spread for almond glue, but mayonnaise works fine too.

Turkey Avocado with Almonds

My middle girls dressed up for the occasion.

Sisters at Tea Time

My teen was miserable and cold. It was rainy all day long. German houses are stone and always cool.

The turkey avocado are her favorites so she’s almost happy!

Tea Time with My Teenager

I also made little triangle sandwiches with the curry turkey and some of the peanut butter honey. They were amazing.

My son ate something totally different. He’s not into sandwiches yet.

Our pretty sandwich platter:

Tray of Tea Sandwiches

I added some fresh local berries and chopped veggies with homemade maple oatmeal scones to complete our tea.

Tea Sandwiches
Print

Tea Sandwiches

Fun tea sandwiches for any occasion!
Cuisine Holiday
Prep Time 30 minutes
Total Time 30 minutes

Ingredients

Cream Cheese Spread

  • 1/2 package cream cheese
  • 1/2 cup Greek yogurt
  • 1 T chives chopped

Peanut Butter and Honey

  • 1/2 cup natural peanut butter
  • 1 T local honey

Turkey Avocado

  • 1 cup chicken or turkey cooked
  • 1 avocado mashed (or prepared guacamole)
  • 1/2 cup almonds sliced
  • 1/4 cup mayonnaise or cream cheese spread

Fillings

  • 3-4 oz smoked salmon
  • 1 cup cucumbers sliced thin
  • 1-2 T parsley chopped
  • 1 cup spinach or watercress chopped

Breads

  • 1/2 loaf wheat bread crusts trimmed
  • 1/2 loaf white bread crusts trimmed

Recipe Notes

Share
Pin
Share
0 Shares
You might also like:

Filed Under: Recipes Tagged With: recipe, tea

Easy Eggs Benedict

This blog may contain affiliate links: disclosure.
Please see my suggested resources.

April 27, 2016 By Jennifer Lambert 25 Comments

I’m not sure why people are scared to make Hollandaise sauce. Maybe it’s the tempering of the eggs into the melted butter.

We found a super easy and quick way to make the perfect Hollandaise sauce!

Tori has always loved fried eggs. Since she’s the only one, she’s often stuck eating scrambled since it’s easier to cook for all of us than just her.

What better way to eat eggs than with ham and lemony buttery Hollandaise sauce?

Dad took Tori to a kids cooking workshop at Harmon’s when she was 8 and the menu included eggs benedict. She was so proud!

Easy Eggs Benedict

We gathered our ingredients for the Hollandaise sauce.

Something so simple bursts with flavor!

I love love love my Cuisinart Smart Stick.

I use it way more than I ever thought I would. It comes with handy little cups and whisk attachments.

Ingredients for Hollandaise Sauce

Tori melted the butter. We don’t own a microwave, so we used our egg pan. It only took a minute.

We’ll use the same pan again to fry the egg. No sense having two dirty pans!

Melting Butter

She did a super job separating the egg yolk! That’s sometimes a tough task.

Separating the Egg Yolk

Then Tori added the water and lemon juice to the egg yolk.

Adding Water and Lemon Juice

Then Tori blended the ingredients together and the sauce voilà thickened and was perfect!

Blending the Hollandaise Sauce

Just look at that creamy thick lemony buttery Hollandaise sauce!

Perfect Hollandaise Sauce

After we made the sauce, the rest of the meal comes together very quickly.

Tori fried her egg. I helped her flip it which is still sometimes difficult for me. She doesn’t like her yolk broken.

Frying the Egg

We fried up some German ham. I sliced a piece of our favorite homemade wheat sandwich bread and toasted it.

Our Favorite Homemade Wheat Sandwich Bread

Then we were ready for plating.

Plating Eggs Benedict

Tori poured her Hollandaise sauce all over her egg.

Pouring the Hollandaise Sauce

Tori likes a bit of sauce.

Perfect Easy Hollandaise Sauce

I think she did a great job!

Why is it called Eggs Benedict?

History gives us at least five stories:

  1. 1860‘s at Delmonico’s Restaurant, NYC- Mrs. LeGrand Benedict discussed a new dish with the chef.
  2. Charles Ranhofer has a recipe called Eggs a la Benedick (Eufa a’ la Benedick) in his cookbook called The Epicurean, published in 1894.
  3. Craig Claiborne wrote a column in The New York Times Magazine in September 1967 about a letter he had received from Edward P. Montgomery, an American then residing in France. Montgomery claimed the dish was created by Commodore E.C. Benedict, a banker and yachtsman who died in 1920 at the age of 86.
  4. Elizabeth David’s French Provincial Cooking 
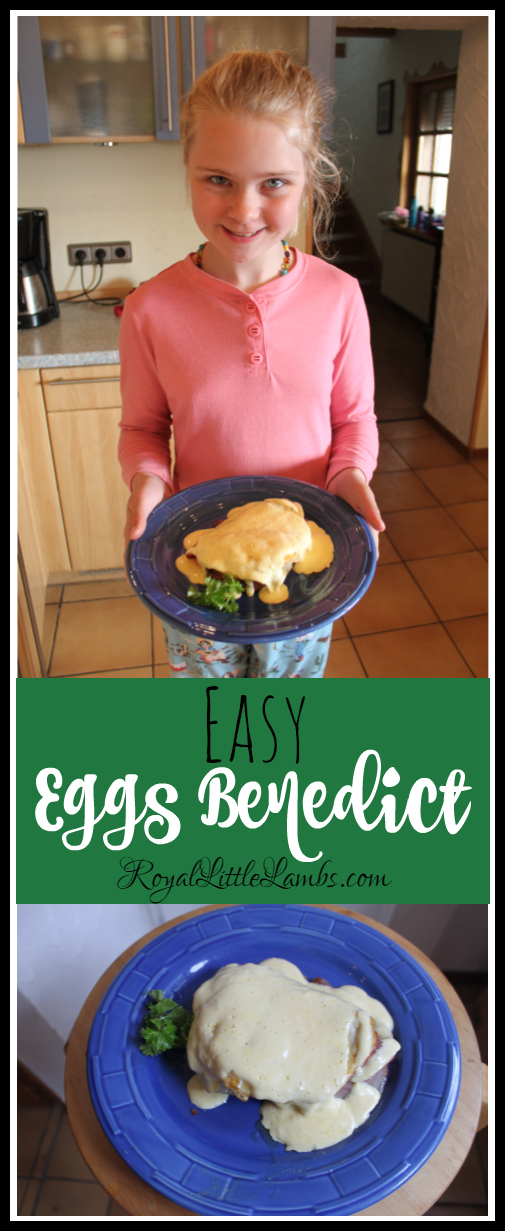
(first published in 1962) describes a traditional French dish named œufs bénédictine. This recipe calls for salt cod rather than ham.
  5. Mrs. Beeton’s Book of Household Management had recipes in the first edition in 1861 for “Dutch sauce, for benedict” (p. 405) and its variant on the following page, “Green sauce, or Hollandaise verte.” Most likely also for codfish.

It’s fun to research food history and even more fun to create and eat fun recipes.

Tori ordered eggs benedict for breakfast twice at Ashford on our Ireland trip.

Print

Easy Hollandaise Sauce

Prep Time 5 minutes
Total Time 5 minutes
Servings 4 servings

Ingredients

  • 1 large egg yolk
  • 1 T lemon juice
  • 1 T warm water
  • 4 T butter
  • pinch kosher salt
  • pinch cayenne pepper optional

Instructions

  1. Melt butter. Separate egg yolk into the mixer. Add water and lemon juice to egg yolk. Blend. Slowly add butter and blend.
Easy Eggs Benedict and Perfect Hollandaise Sauce

Check out the other posts in our Kids in the Kitchen blog hop!

Kids’ Kitchen: Apple Breakfast Loaf Recipe | Sugar, Spice & Glitter
Healthy, Yummy, Gluten-Free Blueberry Muffins | Living Montessori Now
Buttermilk Pancakes with Strawberry Compote  |  Royal Baloo
Tex-Mex Migas | The Gifted Gabber
Pear and banana breakfast oat and almond muffins | Kidgredients
No Bake Energy Bites | Mess for Less
Cheesy Chive Scrambled Eggs | Kitchen Counter Chronicles
Easy Omelet Recipe | Sugar Aunts

Linking up: Sugar and Spice and Family Life, Curly Crafty Mom, Making Our Life Matter, Practical Mom, Life of Faith, Blogghetti, Modest Mom, Marilyns Treats, The Quintessential Mommy, A Proverbs 31 Wife, What Joy is Mine, Donna Reidland, ABC Creative Learning, Home Stories A to Z, Rich Faith Rising, F Dean Hackett, Sarah Celebrates, VMG206, Simple Life of a Fire Wife, Deceptively Educational, Living Montessori Now, Classical Homemaking, Raising Homemakers, A Wise Woman Builds Her Home, A Little R&R, Wholehearted Home, Pat and Candy, Crystal and Co., Oh My Heartsie Girl, Adventures of Mel, The Natural Homeschool,  A Bowl Full of Lemons, Snap Creativity, Buns in My Oven, Bloom Designs, A Bountiful Love,  Lamberts Lately, Frogs Lilypad, I Choose Joy, Wondermom Wannabe, A Kreative Whim, Design Dining and Diapers, Life with Lorelai, Happy and Blessed Home, Sincerely Paula, Create with Joy, the Crazy Organized Blog, Sugar Spice and Family Life, Coffeeshop Conversations,  Being a Wordsmith,
Share
Pin1
Share
1 Shares
You might also like:

Filed Under: Recipes Tagged With: breakfast, eggs, recipe

Dill Chicken Soup

This blog may contain affiliate links: disclosure.
Please see my suggested resources.

April 6, 2016 By Jennifer Lambert 6 Comments

The kids love this creamy dill chicken orzo soup in springtime – or anytime!

It’s a great way to use chicken leftovers.

Or, I roast some seasoned chicken breasts in the oven while I prep everything else.

I seasoned these with paprika, garlic, lemon, salt, and pepper. I drizzled olive oil to make sure they didn’t stick to the pan.


Roast Chicken Breasts
A super easy way to shred cooked chicken is to use the paddle attachment on the stand mixer.
paddle stand mixer
Give it a whirl until it’s the desired shredded consistency.
shredded chicken
I sliced a leek, chopped some celery and carrots. Close enough to the holy trinity of cooking: mire poix.
mire poix
I sauté those up in a little butter and bacon grease.
vegetables
You need a good chicken stock. We usually have some homemade chicken stock in the freezer. But we like Kitchen Basics too.
chicken stock
I dump in the frozen stock and put a lid on it. It melts in a just few minutes.
melt frozen stock
I prefer fresh dill, but we used dried this time.
dill and orzo
I throw a handful of sea salt in a pot to boil the orzo al dente.
salted water
When the water has big bubbles, I dump in about a cup of orzo.
1 cup orzo
I drain 
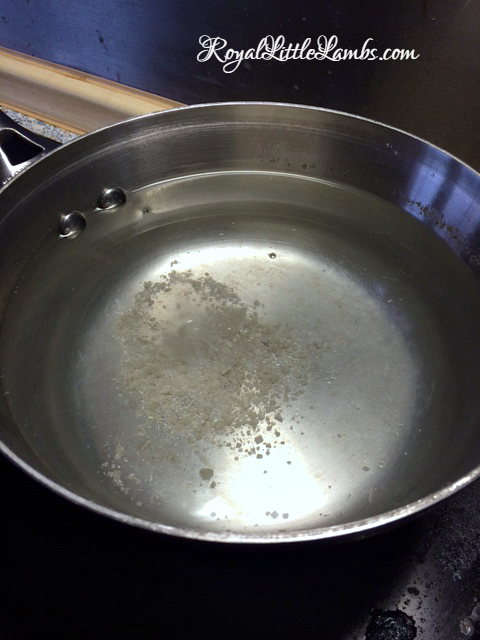
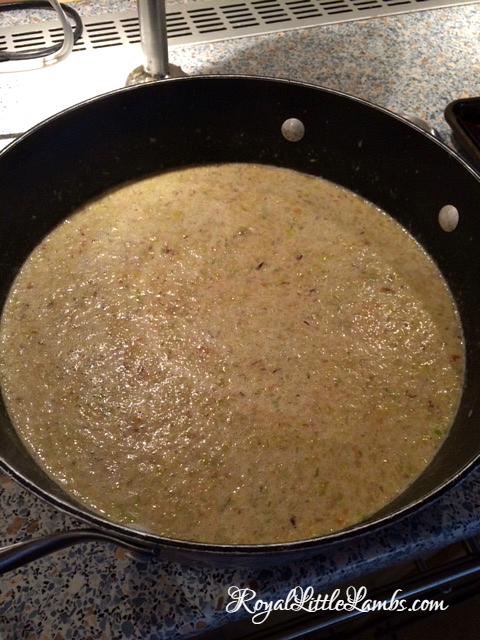
the orzo and spritz on some olive oil so it doesn’t get all sticky.
drain orzo
The stock is melted, so I blend the vegetables with my stick blender.
stick blender
The soup is hot, so be careful with the blender.
blend soup
It’s all pretty now.
blended soup
I add in the orzo and shredded chicken. I sprinkle in about 1 T of dill.
about 1 T dill
It smells amazing.

Dill Chicken Orzo Soup
Print

Dill Chicken Soup

The kids love this creamy dill chicken orzo soup in springtime – or anytime!
Course Soup
Cuisine Soup
Prep Time 15 minutes
Cook Time 20 minutes
Total Time 35 minutes
Servings 4

Ingredients

  • 1 T olive oil or bacon grease
  • 4-6 chicken breasts or thighs boneless, skinless
  • 1 leek sliced
  • 1-2 stalks celery chopped
  • 1-2 carrots chopped
  • 6 c chicken stock
  • 1 c orzo cooked to al dente
  • 1/4 c fresh dill or 1 T dry dill
  • 1-2 T lemon juice

Instructions

  1. Season and roast chicken breasts in oven at 350* until cooked through, about 30-40 minutes. Or use leftover rotisserie chicken.
  2. Cook leek, celery, and carrot, in oil or grease, stirring often, until soft, 5-8 minutes.
  3. Set water and salt to boil. Cook orzo according to instructions. Drain. Drizzle with oil so it doesn’t stick together.
  4. Add broth to vegetables and bring to boil.
  5. Shred chicken with stand mixer or forks.
  6. Blend vegetables and broth with stick blender.
  7. Add chicken, orzo, and dill to soup and warm.
  8. Season with lemon, salt, and pepper.
Share
Pin2
Share
2 Shares
You might also like:

Filed Under: Recipes Tagged With: chicken, recipe, soup

Homemade Taco Seasoning

This blog may contain affiliate links: disclosure.
Please see my suggested resources.

March 22, 2016 By Jennifer Lambert 19 Comments

On Wednesdays, my teenager, Elizabeth, make dinner.

It’s the day I run errands and take the younger kids to music lessons.

This is a great opportunity for kids to be responsible and learn valuable home economics skills.

This week, Katie helped and Liz took pictures of the process.

One of our favorite family meals is homemade tacos.

Whenever we ask the kids what they want for dinner, their go-to is TACOS.

We make our own taco spice mix.

I made the spice mix so pretty, layered in a jar. It looks like sand art!
Homemade Taco Seasoning - Frugal and Healthier

It’s much cheaper and healthier to make our own homemade taco seasoning.

Tacos are easy and quick to make and it’s a great frugal meal for a large family.

The girls browned two pounds of ground sirloin in a large pot.

Sirloin doesn’t have as much fat, so there’s nothing to drain.

You could also use a mix of ground beef and pork, or ground chicken or turkey – whatever you prefer.
Taco MeatMaking Tacos

About three tablespoons of taco spice mix for 2 lbs of meat.

Spices

Two cups of water and stir well. Eventually the water evaporates and leaves it just a bit saucy. After it’s mixed together, put a lid on top and let it simmer on low heat.

Adding Water

Katie enjoyed stirring in the spices.

Adding Spices

Tacos are best with refried beans, cheese, and salsa – to make them even more delicious.

Alex and Tori like soft tacos.
Soft Taco
Katie and I like taco salads. Liz likes crunchy tacos.
Taco Salad

Why do we make our own taco seasoning?

It’s healthier and more frugal.

Spice mix envelope from the store:

Cuminum cyminum, Capsicum annuum,Origanum vulgare, Allium cepa, amalgam of globular proteins, glucose monomer of solanum tuberosum, citric acid, and sucrose.
In non-scientific jargon, it has chili pepper, cumin, paprika, oregano, onion, whey, salt, sugar, garlic, potato starch, and citric acid.
Cost per ounce = 58 cents.
I don’t need milk, sugar, potato, or preservatives in taco seasoning. And I like to know exactly what we’re ingesting. I like control.


My ingredients:

Chili powder, garlic powder, onion powder or flakes, crushed red pepper flakes, dried oregano, paprika, cumin, salt, and pepper.
Cost per ounce = 27.5 cents!
The homemade taco seasoning costs half what the pre-made envelope costs.

And the best thing about this is you can adapt it to your family’s tastes. Substitute smoked paprika or Mexican oregano for a different twist.  If you like it milder, omit the red pepper flakes…if you like it with a capsaicin rush, double the pepper flakes.

It’s a versatile spice mix recipe. Customize it to your family’s tastes!

Print

Taco Seasoning

Mix together ingredients in a jar or airtight container. Use 2-3 tablespoons for ground beef tacos or in all your favorite Mexican recipes!We like to keep a jar of this in our cabinet at all times.I really love lots of chili, garlic, and cumin. Feel free to add as much or as little as you like to create your family’s special blend.It’s a great spice blend for tacos, soups, slow cooker meals…lots of family favorites!
Course Main Dish
Cuisine Mexican
Prep Time 5 minutes
Total Time 5 minutes
Servings 4 servings

Ingredients

  • 2-3 T chili powder
  • 2-3 T garlic powder
  • 2 T onion powder
  • 1-2 t pepper flakes (optional)
  • 2 T dried oregano
  • 2 T paprika
  • 2-3 T cumin
  • 1 T kosher salt
  • 1 T black pepper

Check out the other participants in the Kids in the Kitchen monthly blog hop!

Quick and Delicious Flourless Peanut Butter Chocolate Chip Muffins | Living Montessori Now
Mud Pudding  | Raising Little Superheroes
Mouse-tacular Chocolate Cookies | A Little Slice Of Us
Roll-Out Butter Cookies | The Gifted Gabber
Marble Pound Cake | Kitchen Counter Chronicles
Simple Cupcakes for kids to decorate | Rainy Day Mum
Easy Zucchini Muffins | Mess for Less
Dairy Free Banana Nut Muffins | For This Season
Baked Mini Cinnamon Donut Holes  | Kidgredients
Chocolate Butterscotch Rice Krispie Treats  |  Royal Baloo
Easy Bite Sized Chocolate Dipped Pretzels | Sugar Aunts

Share
Pin2
Share
2 Shares
You might also like:

Filed Under: Recipes Tagged With: frugal, recipe

Make Perfect Prime Rib

This blog may contain affiliate links: disclosure.
Please see my suggested resources.

December 15, 2015 By Jennifer Lambert Leave a Comment

I didn’t grow up eating prime rib like my husband did.

Christmas dinner was ham and turkey, kind of a repeat of Thanksgiving.

When my husband introduced me to this beef feast, I was hooked!

How to make the perfect prime rib:

Perfect Prime Rib

How to buy a prime rib roast

A full rib roast contains seven ribs and is about 16 pounds. For most families, a three-rib roast is plenty big enough and will feed seven to eight people or provide ample leftovers.

Which three ribs are the best?

We prefer the “small end of the ribs” or “first cut” —the area of relatively lean, flavorful meat next to the expensive short loin. You might also hear the three-rib roast referred to as ribs 10–12, since the full rib roast is actually ribs 6–12 from the upper rib section of the animal. The “large end of the ribs,” or ribs 6–9, is next to the chuck with more fat between smaller lean areas.

What’s the difference between Prime, Choice, Select?

Make sure you’re getting Prime.

Prime is the USDA’s best grade. It’s known for luscious fat marbling that locks in the flavor. Choice is the next best grade. Many grocery chains now sell Select, the next grade down. Select is leaner and lacks flavor. Be sure to check the label before buying.

Prime Rib Roast

Does it matter how old the meat is?

Dry-aged beef is preferable for the best flavor. It’s also more expensive. But it’s so worth it! The flavor is concentrated and the texture is more tender. You can dry age meat at home, but be prepared to give it two weeks or a minimum of ten days to make any difference in flavor.

Wet-aging is a fairly recent practice in which meat is stored in a vacuum-sealed bag for a while before being sold. This is just a way for unscrupulous meat sellers to charge higher prices for meat that was going to end up sitting in a plastic bag anyways.

Last year, we had to purchase two small prime ribs to feed our family of six.

Because we like leftovers. 

We are actually unable to purchase Prime grade meat through the commissary here in Germany.

And we’re not sure how to even order these at a German grocer.

Notice these have some marbling. Prime would have more marbling and less fat pockets.

We salt the meat about an hour before the paste to tenderize and lock in more flavor.

We prepared the paste, spread it on the roasts, and let it sit on the counter. It roasts best at room temperature.

We roasted them in the oven. The searing is last for our recipe.

Depending on meal timing and oven needs, we can roast and let rest and then sear the meat right before serving.

After allowing the meat to rest under foil for an hour or so, we slice to serve. I don’t like meat very rare, so we aim for somewhere between medium rare and medium.

This roast was the one we ordered and purchased this year. It was less flavorful than last year’s.

It’s always hit or miss with quality at the commissary, but this still ran us about $100 for a four-rib, 11-pound roast!

My husband loves fresh grated horseradish and I prefer the horseradish cream sauce with gravy. Two kids like it plain. Tori and Katie love gravy on everything.

Prime Rib Holiday Dinner

We often serve prime rib alongside mashed potatoes and green beans. This year, we had twice-baked potatoes and sautéed spinach.

The kids call prime rib “Christmas steak” and they look forward to it!

They love leftovers for a week!

Print

Perfect Prime Rib

Course Main Dish
Cuisine Holiday
Prep Time 1 hour
Cook Time 1 hour
Total Time 2 hours
Servings 1 slice/person

Ingredients

  • 1 5- to 6-lb. Prime rib roast patted dry
  • 4 oz butter unsalted, cut into chunks
  • 6 cloves garlic
  • 1/4 cup rosemary fresh, loosely packed
  • 1/4 cup sage fresh, loosely packed
  • 1/4 cup thyme fresh, loosely packed
  • 1/4 cup Dijon mustard
  • 1 T Worcestershire sauce
  • 1 T kosher or sea salt
  • 1 T coarse black pepper

Share
Pin1
Share
1 Shares
You might also like:

Filed Under: Recipes Tagged With: beef, Christmas, holiday, recipe

Homemade Pizza

This blog may contain affiliate links: disclosure.
Please see my suggested resources.

June 22, 2015 By Jennifer Lambert Leave a Comment

We have homemade pizza every week. The kids looks forward to Pizza Night. We usually watch a movie.

Our Homemade Pizza Recipe is simple, tasty, and all natural!

I perfected this recipe during our first deployment. It saved us a lot of money and is super healthy compared to takeout.

My second job was at Pizza Hut. I paid attention.

I start by proofing the yeast. I add warm water, yeast, and olive oil and whirl it around to blend. Then walk away.

First Ingredients for Pizza

After about 5 minutes, the yeast is frothy and smells great.

Proofed Yeast

I add a blend of flour to get the perfect texture in my pizza crust.

Second Ingredients for Pizza

If you can find a pizza flour or pastry flour, it makes a difference!

Pizza Flour

I pour the flour in on top of the yeast and sprinkle with salt.

Adding Flour and Salt to Yeast Mixture

Having the right tools is important! These are the best baking pans.

Pizza Pans

The dough is all ready when the sides of the bowl are mostly clean. Perfect consistency: not too dry and not too wet.

Mixed Dough

I knead the dough for a few minutes with olive oil. Sometimes, I’ll use more flour if it’s a very wet day.

Dough Ball

Time to let the dough rise for about an hour. I love these cube containers! I often set it by the radiator since it’s warmer there.

Time for a beer!

After an hour, it’s soft and almost double in size. Smells great!

Risen Dough

I love this little scraper, divider, cutter thing.

Divider Cutter

I dump the dough out and divide into quarters for four pizzas.

Divide into Four Dough Balls

I spread the dough by hand and docking eliminates any air bubbles.

Docking to Eliminate Air Bubbles

Time to gather toppings. We like various pepperonis and salamis and sausage. I love red onion, peppers, and mushrooms. Everyone likes extra cheese!

A little sprinkle of fresh Parmesan on top of any pizza is wonderful, by the way.

Drizzle just a wee bit of olive oil for a nice crisp.

Pizza Toppings

I love this brand of pizza sauce since it’s natural, with no icky ingredients. It’s the only one I can find lately.

We often can our own marinara.

I haven’t harvested any tomatoes in a while. I might just go to the farmer’s market and buy a case or two!

Pizza Sauce

Gotta add a sprinkle of oregano. Trust me.

And sometimes a sprinkle of basil and garlic powder.

Oregano

I like the edges crispy. I leave mine in the oven longer than the kids’ pizzas.

Cooling Pizza

The best pizza cutter tool. It rocks back and forth. It’s fun.

Pizza Cutter

This boy is super happy and ready to eat and watch a movie!

Pizza Night

Top the stretched out pizza dough with favorite toppings and bake at 450* for about 10 minutes.

Honey or sugar is optional and just makes the dough a bit sweeter.

Print

Basic Pizza Dough

Course Main Dish
Cuisine Italian
Prep Time 10 minutes
Cook Time 10 minutes
Servings 4 large dough balls

Ingredients

  • 1 packet yeast or 2 1/4 t
  • 2 cups warm water
  • 1 T honey or sugar optional
  • 1/2 c olive oil
  • 6 cups flour I do a blend of pastry or bread flour and whole wheat
  • 1 t kosher salt

Instructions

  1. Add yeast, oil, salt, and honey to water and let proof for about 5 minutes until bubbly.

  2. Add flour gently and mix until it forms a ball.

  3. Knead for a few minutes on floured countertop and form into a boule.

  4. Let rest for at least 1 hour in oiled lidded container. It will double in size.

  5. Cut dough balls into desired sizes for pizza. Use fingers to spread into desired shape, not a rolling pin.

  6. Dock to eliminate air bubbles. If using a peel, sprinkle semolina or cornmeal to keep dough from sticking. Place dough on peel.

  7. Add sauce and toppings.

  8. Slide pizza onto stone in oven. Bake at 500* for about 10 minutes.

  9. Cut and serve immediately.

Recipe Notes

This dough recipe makes two large pizza doughs.


Some of my favorite pizza tools:

Our new and improved pizza recipe:

UPDATE:

Now that we’ve moved back to the States, I’ve invested in some pizza stones. We bake the pizza at 500* for about 10 minutes. I use Wheat Montana flour.

Print

Pro Pizza Dough

Course Main Dish
Cuisine Italian
Prep Time 10 minutes
Cook Time 10 minutes
Servings 6 personal pizzas

Ingredients

  • 2 cups warm water
  • 1/2 cup extra virgin olive oil
  • 2 T yeast
  • 1 T kosher salt
  • 6 cups really good quality AP flour I use 5 cups Wheat Montana Premium All-Purpose Flour and 1 cup white or whole wheat

Instructions

  1. Mix ingredients in stand mixer until dough pulls away from sides of bowl.

  2. Knead dough on stone counter until it feels smooth. I usually don't need to add any more flour or oil.

  3. Coat with about a tablespoon of good olive oil and place in sealed container for a few hours to rise.

  4. Cut into individual size doughs and press out dough by hand. (Using a rolling pin makes it tough.)

  5. Place dough on pizza peel. Use semolina to keep dough from sticking. Top with your favorite toppings.

  6. Bake for about 10 minutes in 500* oven on preheated pizza stone.

Recipe Notes

This dough recipe makes enough for 6 personal pizzas that fit well on our pizza stones. 

Share
Pin1
Share
1 Shares
You might also like:

Filed Under: Recipes Tagged With: frugal, pizza, recipe

Ham and Bean Soup

This blog may contain affiliate links: disclosure.
Please see my suggested resources.

January 19, 2015 By Jennifer Lambert Leave a Comment

On dismal cold winter days, I just want soup.

My husband used to love a certain canned variety of ham and bean soup.

This is a much healthier, more natural version of that soup.

Warm comfort food – filling and cozy on blustery days.

Warm Comfort Food - Ham and Bean Soup

We put our holiday ham bone in the freezer with just this soup idea in mind. A frugal way to use the flavor and hammy tidbits rather than wasting.

Ham and Beans

When we’re in a pinch or hurry, this is my favorite stock to use. We often keep quarts of homemade stock in the freezer.

And I am absolutely in love with this soup starter seasoning. I seriously put it in everything. I can’t vouch for the chemical-free-ness of this product in the States, but it is a pantry staple in Europe!

Stock and Soup Seasoning

All good soups being with mirepoix, no?

Mirepoix

All ingredients in the slow cooker. (I need a bigger slow cooker!) It smells heavenly after simmering for a few hours.

Ham and Bean Soup

This ham and bean soup was a HUGE hit for dinner with the whole family!

Ham and Bean Soup for Dinner

Ham and Bean Soup Recipe

*If I were making this for myself or a special event, I would add chopped red pepper and peeled, cubed sweet potatoes. I think that would be mighty fine. My husband and kids aren’t big fans of peppers and sweet potatoes.

What’s your favorite warm soup for cold days?

Print

Ham and Bean Soup

Course Soup
Cuisine Soup

Ingredients

  • 1 Ham bone or chopped ham or smoked pork shank (we froze ours after a holiday meal). You could even use smoked sausage – or a beef or turkey product. I love versatility!
  • 1 bag of mixed beans
  • 1 large carrot, chopped
  • 1 small onion, chopped
  • 2 celery stalks, chopped
  • 1-2 garlic cloves, minced
  • 1 box chicken stock
  • 1 Tablespoon soup seasoning optional
  • salt and pepper to taste

Instructions

  1. Soak beans overnight or according to package instructions. Combine with hambone in slow cooker. Arrange veggies, stock, and seasoning around hambone. Cook on low for 6-8 hours. Adjust seasoning. Serve with cornbread and salad.
Share
Pin8
Share
8 Shares
You might also like:

Filed Under: Recipes Tagged With: pork, recipe, soup

Easy Macaroni and Cheese

This blog may contain affiliate links: disclosure.
Please see my suggested resources.

May 14, 2014 By Jennifer Lambert Leave a Comment

The boxed stuff just isn’t near as good and this is almost as easy.

Simple stovetop or baked Easy Macaroni and Cheese that’s healthier than a box.

mac

Alex wasn’t thrilled at first. I will blend cheeses next time to better please his palate.

He asked me: “Is the box kind not healthy?”

I answered that this is healthier and he accepts that.

Simple.

The texture is a little different than he’s used to.

mac and cheese

The kids preferred it baked with some Italian seasoning and bread crumb topping. I love it that way. Also amazing with bacon or ham and peas.

Whatever works.

Easy Mac and Cheese
Print

Easy Macaroni and Cheese Recipe

Ingredients

  • 1 box noodles, according to directions on box and drained but not rinsed
  • 2 T butter
  • 1/4 c AP flour
  • 1/2 t pepper
  • 1 t salt
  • 1 t dry mustard
  • 1 c milk
  • 3 c shredded cheese (a blend of cheddar, Parmeson, Colby, provolone)

Instructions

  1. Melt butter and add flour to make a roux. Pour in milk and whisk until smooth. Add mustard and salt and pepper. Add shredded cheese, whisking until melted and smooth.

    Add cooked and drained noodles to cheese mixture and stir until it’s all cheesy goodness!

    You can eat immediately or bake with bread crumbs or other toppings for an extra treat.

Share
Pin
Share
0 Shares
You might also like:

Filed Under: Recipes Tagged With: cheese, noodle, recipe

  • « Previous Page
  • 1
  • 2
  • 3
  • 4
  • 5
  • 6
  • Next Page »
Suggested ResourcesReceipt Hog

Archives

Popular Posts

10 DIY Gifts with Essential Oils10 DIY Gifts with Essential Oils
Natural Remedies for HeadacheNatural Remedies for Headache
10 Natural Remedies to Keep on Hand10 Natural Remedies to Keep on Hand
Henna Hands CraftHenna Hands Craft
Homemade Turkey Divan CasseroleHomemade Turkey Divan Casserole
This website uses cookies to improve your experience. We'll assume you're ok with this, but you can opt-out if you wish.Accept Reject Read More
Privacy & Cookies Policy

Privacy Overview

This website uses cookies to improve your experience while you navigate through the website. Out of these, the cookies that are categorized as necessary are stored on your browser as they are essential for the working of basic functionalities of the website. We also use third-party cookies that help us analyze and understand how you use this website. These cookies will be stored in your browser only with your consent. You also have the option to opt-out of these cookies. But opting out of some of these cookies may affect your browsing experience.
Necessary
Always Enabled
Necessary cookies are absolutely essential for the website to function properly. This category only includes cookies that ensures basic functionalities and security features of the website. These cookies do not store any personal information.
Non-necessary
Any cookies that may not be particularly necessary for the website to function and is used specifically to collect user personal data via analytics, ads, other embedded contents are termed as non-necessary cookies. It is mandatory to procure user consent prior to running these cookies on your website.
SAVE & ACCEPT